The walls of the house, decorated with paintings and panels, can add depth and originality to the interior. You can buy ready-made works in a store, but stamped products have no soul, and there is a great chance that you will come across exactly the same “work” from your neighbors or friends.
That is why ideas and instructions for making homemade paintings are very popular among needlewomen. For the kitchen, dining room, cozy room in a cafe or veranda at the dacha, you can try making panels from coffee beans.
The secret of popularity
Why should you use coffee beans for decoration? There are several reasons:
- the crafts turn out “tasty” in every sense: the smell of the grains is pleasant and is associated with warmth and comfort;
- the color range of grains is rich - you can lay out a complex pattern with a transition of tones;
- a pack of inexpensive coffee is enough for several miniatures - it is an economical and affordable material;
- the noble shade of the grains goes well with most interiors.
If you look at the photo of panels made of coffee beans, most of them will support the theme of a morning cup of an invigorating drink. But there are many original themes for a children's room, hallway and even living room.
Some tricks
In order for the process of creative activity to bring you only positive emotions, and for the products to turn out more beautiful, it is not necessary to have amazing talents for art. You just need to follow some recommendations.
- For your creativity you should use only high-quality materials. But this does not mean that you need to buy all the most expensive things in the store. Not at all, expensive is not always good. It’s enough just to study the composition, look at the country and manufacturer, and evaluate the overall quality by eye. This will be quite enough;
- You don’t need to limit yourself to just repeating other people’s work. At the beginning, you can watch various master classes and learn from them. But later it is advisable to create your own masterpieces. Other people's works should only inspire you, perhaps guide you towards a certain idea, but not be an exact copy of your idea;
- The key to success in any activity is love for work and dedication. If you feel that this is yours and you like to do this particular creativity, continue to follow in this direction. The work will be of high quality only when the master himself enjoys it.
Related article: DIY modeling clay: a simple recipe for crafts
What to prepare for work?
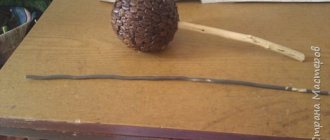
To start creating, you will need a base on which the grains will be glued. This can be a piece of canvas, matting or any other dense fabric (including colored fabric). In the absence of a fabric base, thick cardboard will do.
Here is a sample list of what you will need to make a panel with coffee beans:
- baguette or frame for framing a homemade masterpiece;
- glue gun and several sticks of glue,
- additional decoration elements.
Among the latter, beads, coins, twine, pieces of lace, dried flowers and much of what is stored in the stocks of skilled craftsmen are suitable.
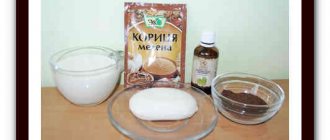
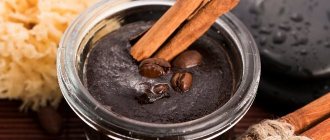
Cinnamon sticks, dried citrus slices, small pretzels, star anise, and cloves are often used as tasty additions to the picture. Beans and nut shells go well with coffee beans.
Almost all decorative elements can be found in the kitchen or in the nearest store.
How I create coffee drawings on paper
Greetings to all! I really, really love to draw, especially with coffee solution on paper. My first experiments with coffee on paper appeared in 2010. At that time I couldn’t drink coffee at all, and I decided to try drawing with it to feel my favorite aroma. Happened! Now I can’t stop. I’m experimenting with adding cocoa, chicory, vanilla, cinnamon, sugar. I combine coffee with watercolors.
I decided to make this little master class on coffee drawings so that anyone could try to create their own fragrant fairy tale. It's not difficult: you'll need coffee, brushes, high-quality watercolor paper, clean water, napkins, and a frame with glass.
First, you need to prepare a coffee solution for drawing. I tried boiling ground coffee until thick, but now I use a simplified recipe. I take instant granulated coffee (it’s important that it’s not the cheapest) and add enough water to make a creamy mass. I definitely give it time to settle, then the solution becomes uniformly glossy and syrupy without any bubbles or undissolved granules.
Synthetic brushes are suitable: round and oval, thin (No. 2, 4) and thicker (No. 8, for example). Natural round brushes will also work.
Paper is a material on which you definitely shouldn’t skimp. The density should be 270-300 g/m2 (ordinary watercolor paper - about 200 g/m2 - will not work). I use a good French torchon, it has cotton fibers added to it, suitable for wet watercolors and for coffee drawings, of course. I like paper from Fontaine, Lana, and Canson.
Water is needed to adjust the tone. If a dark shade is required, take the coffee solution in its pure form; if a lighter tone is required, dilute it with water. It turns out a wonderful sepia stretch in color.
Napkins are useful for blotting off excess moisture from brushes.
Well, at the end you need to protect the dried drawing with glass and frame it. If this is not done, the drawing may deteriorate from moisture. Unplanned droplets leave light spots and streaks on the image. It is not necessary to fix the drawing with varnish, because... Coffee under glass is preserved perfectly, but the varnish can ruin all the charm of the aroma of a coffee masterpiece.
So, the materials are ready. Let's get started. First the background. We moisten the paper with clean water, and then apply coffee with a wide brush or a piece of padding polyester, in my example quite evenly. Let's wait a little until the background dries a little. Now, in the most general terms, with spots, we denote the composition of the picture. From light to dark, from general to specific. More and more details and richness of tone. The last drawing is done with a thin brush over the dried drawing. To get light highlights, you can use another move: drop water on top of the coffee and quickly blot it with a napkin - a light spot will remain.
Here are step-by-step photos of a bouquet of sunflowers (the last image is scanned, so the color difference is):
The desire to experiment and a creative mood help! A new MK is planned 
With best wishes, Yulia Grechukhina.
Subject of paintings
Before you make a panel of coffee beans with your own hands, you need to decide on the theme of the work. Even those who lack artistic talent will be able to repeat the following plots based on:
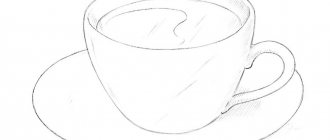
- a coffee cup or mug from which a thin stream of steam rises;
- watch silhouette;
- simple and understandable phrases in English: “I love coffee”, “Good morning”, “Coffee time”, “Coffee & Milk”, etc.;
- silhouette of a man or woman with a cup of coffee in his hand;
- animal figurines;
- abstract figures and lines;
- world map.
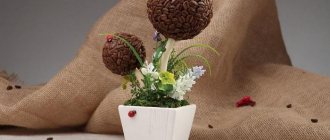
Coffee beans glued to the base immediately create a three-dimensional image, but you can add additional relief to the picture using artificial flower buds, spikelets, flat shallow plates, and spoons.
Let's imagine with children
There is another simple and charming option for a coffee panel - zebra. Even your kids can handle this kind of work.
And girls will especially like the cute kitten - and they will be able to use their abilities in decorating such a Vaska or Murka. You can use buttons or foamiran as eyes.
Coffee crafts seem complicated only at first glance, but they are not. Many needlewomen encourage people not to be afraid to experiment - try, fantasize, don’t repeat other people’s works, but create your own, unique ones.
The panel One World, One Family, One Coffee, made in 2011, measures 25 square meters. meters and weighing 140 kg from a million aromatic grains by the Albanian master Samira Strati, perhaps the most grandiose canvas in the world. So go for it, skillful hands!
How to arrange the canvas in the interior?
If you choose a horizontal orientation for the panel, it will visually expand the wall on which it will hang. Narrow work with a vertically positioned image will visually increase the height of the ceiling. Large voluminous elements in the picture are better perceived if viewed from a distance of 1-2 m.
For a small, narrow room, it is better to create a panel with several small components or one central image.
They need to be placed at eye level of the person looking - approximately 1.5 meters. If the craftswoman plans to create several works, then paintings of the same theme and execution technique should be concentrated in one room.
If the walls are plain, for decoration it is enough to choose a good molding that suits the style. Colorful wallpaper can interrupt the idea of a design with its print. In this case, the canvas should be separated from the frame by a wide mat.
Making the most morning panel
Many people's day starts with a mug of coffee. Here is a step-by-step process for making a panel with a description of how to create a picture of a cup with your favorite drink from grains.
Industrial vacuum pumpDIY stencils of beautiful snowflakes from A4 paper
- DIY paper crown: ideas, templates and tips on how to make a real crown (video + 130 photos)
- Cut off the top of a small plastic bottle. We cut the resulting funnel in two, leaving a neck with turns for twisting on one of the parts. We will work with a half without a neck. We apply it to a piece of thick cardboard and trace it along the contour.
- We repeat the operation, placing the workpiece vertically on the cardboard - the resulting semicircle will be the bottom of the cup.
- On the remaining cardboard we randomly draw a detail that resembles a watermelon slice in outline, but is more elongated and thinner - this is a blank for a saucer.
- We glue the cardboard and plastic together, and cover the future mug with masking tape. We paint everything (including the saucer blank) with thick brown gouache.
- When the paint is dry, we begin gluing the grains. You can place them with the convex side only outward or only inward. It is not forbidden to alternate grains, changing direction.
- We glue the saucer from the ends, bottom and top. You should get a neat “watermelon rind”. Glue a mug and a saucer underneath it to the center of the canvas. Using coffee beans nearby, we make a semicircular handle.
- Add cinnamon sticks to the saucer (you can tie them with a piece of twine) and a dried lemon wedge. If you have experience in modeling foamiran, it’s good to make a chocolate slice or cake out of it.
- Roses made from citrus peels look good as decoration: a thin and narrow strip of peel from an orange, tangerine or lemon is rolled up and secured with a toothpick at the base. Dry it.
- Draw the outline of steam above the cup. Fill with PVA glue and immediately sprinkle with ground coffee. Let dry and shake off excess. We add a flower or an inscription to the bottom of the picture. The panel is ready. We insert it into a frame and hang it in its rightful place.
The step-by-step process of making panels
The simplest product is frames for decorating your favorite photo or interesting painting. Choose a suitable cardboard frame, apply glue with a brush and glue the grains to the surface at your discretion.
To make panels, we make markings on the base. Moreover, the burlap can be decorated in different ways: using a piece of cardboard, fold it over to the back side and glue it, or you can “ruffle” the edges and give the panel a piece of “boho” style.
Then, using a simple pencil or a bar of soap, apply the design of your choice. Now you can get creative directly.
Panel with a flat cup of coffee as a gift
If you want to create an original gift for the home of a loved one who loves coffee, please him with this panel:
- In the center of the horizontal canvas, lay out the silhouette of a cup standing on a saucer.
- Seal the space inside the outline with grains.
- Glue the handle.
- Place two or three curved lines of different lengths above the cup - this is the steam from the aromatic drink.
- Glue several rows of successively arranged grains around the perimeter of the picture - you will get a frame.
- Inside the picture, fill the empty space with decor from twine and a few coffee beans and a dedicatory inscription, for example, “to your beloved friend.”
This panel turns out warm and cozy. It will definitely warm the heart of the person dear to you.
It's great to experiment with coffee beans. You can involve children from an early age to create abstract paintings. Create for your own pleasure and please everyone you care about with the results of your work.
DIY photo panel of coffee beans
How to make a three-dimensional paper house: step-by-step master class and instructions for making a doll and toy house (155 photos + video)Making peony flowers from corrugated paper - a guide for beginners and a step-by-step master class on how to make a flower with your own hands
How to make a beautiful tree of happiness with your own hands: step-by-step master class for beginners (100 photos + video tutorials)
How to make a beautiful lampshade with your own hands: simple ideas for table and floor lamps (125 photos + video)- How to make polymer clay at home: DIY master class (125 photos + video)
How to make a paper hat with your own hands - templates, design ideas and tips for those who are making a hat for the first time