Draw a cup with a pencil step by step
You can hang it in a prominent place and admire it. Believe me, it will invigorate and delight you no less than coffee itself. And all you need to do is, of course, drink a cup of coffee, prepare the necessary tools and start drawing.
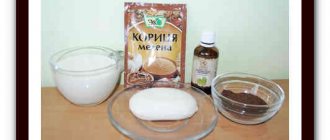
To complete the drawing with a cup of coffee you will need:
- watercolor paper,
- simple pencil,
- eraser,
- liner (thin black marker or gel pen),
- watercolor paints,
- small brushes.
- water container,
- palette.
Basic elements of pitching technique
To understand how frothed milk behaves and how to draw on coffee using a milk jug, you need to master a few simple shapes. Then, based on them, you can learn to make more complex drawings.
Heart
This easy-to-make element is invariably popular in coffee shops. You need to pour the milk into the center of the cup to form a circle. Cross out the white spot with a thin stream, raising the milk jug higher. A depression will appear at the top, and a pointed tip at the bottom.
Star
Make a white circle in the middle of the cup and pour in the milk. Trace the topping around the outline using a pastry syringe. At some distance, make a circle of larger diameter. Using a toothpick, draw several lines from the center of the stain to the edges of the cup.
Rosetta
This figure is similar to a leaf or flower. The espresso cup is held at a slight angle. Milk foam is poured in, making semicircular lines one above the other with the pitcher, gradually reducing their length. Then, moving downwards, you need to cross out the lines, drawing a stem. The lines will bend slightly and pull down.
Anyone can create latte art on cappuccino coffee foam. It is not difficult to master stenciling or engraving techniques, and real coffee art artists endlessly hone their skills.
Source
Cup of coffee: top view
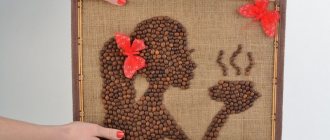
If you are an avid coffee lover, then you probably know that one of the trendy details that always accompanies any cup of coffee is a unique pattern on the coffee foam. Let's try to depict just such coffee.
To do this, let's take an unusual angle of a coffee mug - a top view. It will help us present the drawing on the foam in the best possible way, because this is where we want to concentrate the viewer’s attention.
Draw a circle in the center of the sheet. This will be the top of the cup.
Add thickness to the cup, it is ceramic after all - make an outer outline around the circle at a distance of 2-3 mm.
Then add another stroke around the circle, but this time inside it - this will be the border of the poured coffee.
Add a handle to the mug.
Draw the image with a thin black outline.
Then start working on the design on the foam. Give free rein to your imagination. Make a light pencil sketch.
Fill it with pale blue paint and leave until completely dry.
Wet the brush with water and fill the entire space around the design on the foam with it. This is necessary so that the colors applied next flow beautifully into each other, and the result is a shade of coffee that is recognizable to everyone.
Take the yellow color and apply it to the design in the center of the cup.
Then take a dark orange color and fill the remaining areas around the edges with it.
After that, introduce the brown color, starting adding it from the top left of the drawing and moving down to the right, blurring it a little.
Leave the work until completely dry.
Take a dark brown color and apply a shadow in the upper left part of the cup, next to its wall.
Use a dark gray color to paint a shadow on the handle of the cup, as well as a falling shadow on the surface of the table.
Dry the painting again. Erase all pencil lines.
Using a thin dark brown outline, draw the outer border of the coffee, draw bubbles on its surface.
If desired, you can spray a drop of brown paint on the finished piece. This technique will imitate drops of coffee on the tablecloth.
The work is ready!
Methods for creating latte art drawings
Baristas use three techniques for applying images to coffee foam:
Stencil method
The easiest way to create a beautiful design is using a stencil. To do this, a circle is made from cardboard, with a cut out shape and placed on a cup. The design is created using powdered sugar, cocoa, cinnamon or chocolate.
Engraving method
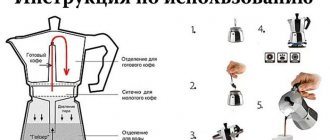
This is a more complex method that involves the use of a pitcher and other devices to decorate the latte. The essence of the procedure is to smoothly pour milk onto the surface of the coffee foam. In this case, the pitcher must be as close as possible to the surface layer of the drink, otherwise the milk will simply drown.
Beginners often ask the question: “How to draw a design on coffee with chocolate topping?” Indeed, a pitcher and other traditional tools will not help here. Professional baristas use a pastry syringe with a fine nozzle. In addition to topping, they can be used to dose syrups and any other viscous substances.
Etching
You've probably noticed how baristas in restaurants deftly use small chopsticks or even ordinary toothpicks. At this moment they demonstrated etching - drawing with sharp objects. The essence of the method comes down to immersing grated chocolate, cinnamon, and any other ingredients that act as a toner in foam and then shaping the resulting dark spots into the desired patterns.
Cup of coffee with whipped cream
Using a narrow, horizontally oriented oval, draw the top of the cup, as if looking at it from the side.
Below it, draw the cup itself in the form of a semicircle. Draw the handle.
Then draw whipped cream in the form of a “cap” rising above the surface of the cup. Using separate lines, show their loose, voluminous, cloud-like structure.
Outline all the lines of the drawing with a thin black outline. Don't forget to add volume to the handle and thickness to the wall of the mug.
Before you start working with paints, decide which side the light will fall from. It is fundamentally important that you apply all the necessary shadows realistically.
First, work on the area of the drawing where the coffee itself is located. Mix yellow, dark orange and brown colors in it.
Then take the same color mix, dilute it with water and apply the shadows over the cream.
Let the work dry a little. Take the caramel color and apply more saturated shadows to the foam. You will see how the work will immediately “play.”
Use a light gray color to shadow the mug and create a cast shadow on the table.
Dry the work thoroughly again.
Using a thin dark brown outline, draw chocolate chips onto the foam.
A cup of coffee with whipped cream is ready!
Coffee art techniques
There are several ways to decorate coffee. Some techniques are within the capabilities of anyone, while others must be mastered over a long period of practice. The easiest way to draw on cappuccino is not to mix the layers, but just on top of the drink.
Stencil. With the help of a stencil and powder, even a beginner can draw on coffee at home. Template sets include pictures of various themes, patterns and inscriptions. You need to hold the stencil over the finished drink and pour cocoa or cinnamon into the slits through a strainer. Sometimes grated chocolate is also used.
You can buy cappuccino stencils or make your own. To do this, cut out a circle from thick cardboard with a diameter slightly larger than a coffee cup. Then they make an inscription or image from individual elements, and then cut them out with a stationery knife. The thinner the slits, the more beautiful the image will be.
On dense foam, the pattern lasts up to 10 minutes.
Engraving. Usually combined with other, more complex techniques. Draw with a pastry syringe with syrups (toppings). With a thin line you can draw the most intricate figures. To prevent the drawing from sinking, the tip of the syringe must be kept very close to the surface of the cappuccino.
When choosing a syrup, you need to be guided not only by its taste, but also by its color. It is better to paint with the darkest colors - chocolate and caramel. The cherry topping will look original and also goes well with coffee.
Making topping designs for coffee or cappuccino at home is easy if you have a cappuccino machine that whips up thick milk foam. But if you don’t have a coffee maker with this function, you can still learn how to draw using stencils and syrups. The image holds well on coffee ice cream, the top layer of which is ice cream.
Pitching. In the pitcher, milk is frothed and heated using a cappuccino maker, and then the foam is poured onto the coffee, creating a pattern.
They start drawing from the center. You need to carefully pour the foam so that it sinks to the bottom. When a white spot appears on the surface, you can start. By raising and lowering the spout of the milk jug, making the stream thinner or thicker, and tilting the cup, you can achieve the appearance of different shapes from the foam.
Etching. By plunging a thin, pointed stick (toothpick) into the cappuccino, the barista makes the espresso come to the surface. The results are dark drawings on a white background. For a clear picture, the toothpick should be wiped off after each dip.
3D. Three-dimensional images made from milk foam are the calling card of coffee art masters. The durability of the pattern depends on the complexity of the figure and the density of the foam.
The easiest way to draw a glass of water
In this master class you will learn how to draw a voluminous, transparent glass of water.
Stage 1 – building a glass
We begin to construct a glass with an HB pencil. We outline the height of the glass and the width of the glass. Please note that the upper part of the glass, that is, its neck, is wider than the base of the glass. We begin to designate ellipses. Please note that the upper ellipses should be narrower than the lower ones. When drawing an ellipse, we draw a rectangle and divide it both along the axis of symmetry and in half. But at the same time, we still try to make the lower part a little larger than the upper.
Thus, we draw three ellipses: the upper ellipse, where we have the neck, the lower one, where the base is, and just a little above the base to show the thickness of the base of our glass. After this, we outline the water level and, approximately, the border of the shadow in the glass.
Stage 2 – showing the depth of the glass
We erase with an eraser all unnecessary construction lines - the far part of the ellipse, the axis of symmetry, restore the lines that we need if they are worn out.
We take a 4B pencil and begin to complement the tone of the top of the glass. We slightly shade the neck, darken the thickness of the glass, and, starting from the center, with such circular shapes, we begin to show the volume and depth of our glass, alternating dark and light tones. We try to make it a little darker in some places, a little bit lighter in others. Also, at this stage we darken the edges of the glass a little.
Stage 3 – pencil shading
How to beautifully shade a glass? Apply the tone to the bottom of the glass, where the water and its base are located. We darken the water more than the top of the glass than the neck, and in the same way we begin, with more circular movements, to apply dark and light strokes with the flat part of the pencil.
Stage 4 – adding highlights
Let's do the shading. With a little stroke we emphasize the edges of the glass, darken the part where we have water, then use the tip of a pencil to darken the darkest places on the glass - they are on the base. At the end, we use an eraser to show the highlights and the plane of our glass. In order to show that our glass is materially appropriate, we must make one light highlight, not very clear, vertically.
Thus, we have a drawn glass glass, with a shadow from the water, which helps to convey the volume of this very glass, and now it does not seem so flat, which is very important when you draw a realistic drawing.
Equipment for a master class on pencil drawing
To draw a glass easily and quickly, you will need good quality thick paper, a well-sharpened pencil, an eraser and a stationery knife, so that if the pencil breaks or becomes dull, you can sharpen it to perfection.
For the following master classes on drawing a glass you will need:
- paper for drawing - it is best to take paper with the inscription GOZNAK (you can also use watercolor, but we do not recommend drawing on a thin landscape sheet);
- simple pencils HB, 4B.
- eraser.