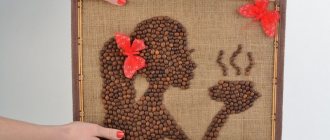
Coffee bean magnets
A very suitable job for beginners.
Tools and materials:
- Magnitik
- Thermal gun
- Small piece of fabric
- Paper
- Thick cardboard
- Scissors
Wedding bouquet of sweets
In search of an unusual bouquet for your wife, you can choose a beautiful wedding bouquet made from sweets. For a non-standard wedding celebration, a similar bouquet of candy flowers will be the highlight of the look.
To design a wedding bouquet of candies, luxury candies “Raffaello” and “Fererro Rocher” are often used. The flower buds themselves are placed neatly and tightly against each other. Wives can choose wedding bouquets made from sweets in the form of roses, orchids and delicate peonies.
Brush for removing glue residues
Select the type of magnet you need and cut out a template from paper. Using a template on cardboard, cut out the part. Use a glue gun to glue a magnet to the cardboard. Cover both sides of the cardboard with fabric. On the back side, where the magnet is attached, you can make a fabric coupling. This part will be the back of the craft.
Glue the first layer of grains, with the hollow inward. After the glue has dried, you need to clean the grains of the craft from the glue. Glue the second layer the other way around, with the depression facing outwards. You can also decorate the craft with other elements. These can be bows, jute, beads, etc.
Regular bouquet of candy flowers
Beautiful bouquets of flowers made of corrugated paper with sweets in buds are very popular at the moment. A similar surprise is naturally addressed to the ladies.
Agree, a unique bouquet of flowers made from candies is perfect for March 8th; beautiful bouquets of candies in the form of roses can be presented for name days.
You can pack a bouquet of sweets in ordinary flower paper. At the moment, plain and natural wrapping paper for flowers is in fashion. The simpler a bouquet of sweets is packaged, the more elegant and tasteful it looks.
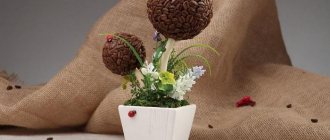
A coffee tree
Our master class on coffee crafts offers a look at two main techniques for creating a tree and gives instructions on how to make a “coffee tree” craft to suit your taste. The “coffee tree” craft is the classic and most common version of topiary in coffee art.
Tools and materials:
- Coffee beans
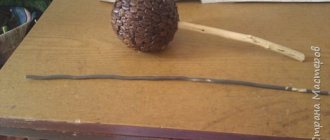
- Pencil, stick or twig
- Pot or cup or any other container you like
- Alabaster
- Ball.
- Pot filler. (small pebbles or glass, moss, etc.)
- Brown acrylic paint
- Leg-split
- Hot glue
- Scissors
- Additional decor for decorating topiary
First you need to paint the sphere and the future trunk of the craft brown and let it dry. Coffee beans need to be sorted into several groups, after weeding out the broken ones.
- Round
- Beautiful
- Regular
- Small
Beautiful beans are suitable for the most visible part of the crown of the coffee tree. The less noticeable lower parts of the crown are decorated with ordinary ones. Small ones can be used to cover grain gaps when they appear. Round ones are suitable for finishing the topiary pot itself.
Prestigious bouquets of sweets in a box
Bouquets of flowers made from candies in a box look very cute and fashionable. This can be a flat box in which you can put the flower buds themselves from candies. A bouquet of sweets in a cylindrical box really looks great.
Square and round boxes are also perfect for designing a bouquet of candy flowers. The box itself can be wrapped in paper, painted, and decorated with a ribbon and bow. You can decorate a box for a bouquet of chocolates in an original way with lace or simply wrap it in burlap.
Crown
To design the crown, you can use one of the proposed methods.
A. According to this scheme, the use of assembly adhesive is more relevant. Squeeze glue onto the ball and let it spread over a small area of the ball. Sprinkle this place with grains and manually level them and carefully place them on the surface.
It is advisable to put something under your hands so that the coffee does not spill on the floor. The advantage of this method is that the glue, unlike hot melt glue, is not hot, which allows you to distribute the coffee beans more freely and slowly over the crown of the topiary. The grains will be laid out in the intended manner, but chaotically.
B. According to the second scheme, each grain is glued separately. Most often, the grains are arranged like a honeycomb. But you can also glue the coffee in strips, horizontally or vertically. This is done to combine light and dark tones in a composition.
If desired, the tree crown can be covered with a second layer of coffee if you don’t like the gaps between the grains. If you have such an idea, then, as before, glue the first layer with the indentation inward (bad beans will do), and the second indentation outward.
Leave the space near the hole undecorated.
Master Class
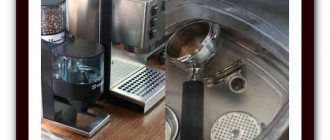
- Cover the saucer with pieces of wet newspaper in two layers, then glue on another 8 layers. This technique is called papier-mâché; a detailed master class and features of this technique can be viewed here. Image 1.
- Cover the cup in the same way, leaving the handle uncovered. Image 2.
- Leave the cup and saucer to dry completely.
- After drying, remove the paper blanks from the dishes and trim the edges. Image 3 and 4.
- Cover the hole in the pen cup with newspaper.
- Insert the knitting needle into the saucer, bend it and secure it with titanium glue. Image 5.
- Glue the saucer and cup on both sides with twine in a circular motion tightly to each other, fixing with titanium glue.
- Bend the knitting needle to secure the cup. Image 6 and 7.
- Attach the cup. Image 8 and 9.
- Wrap the knitting needle with knitting threads and secure with glue. Image 10.
- Glue the knitting needle with titanium glue with coffee beans, and also glue them to the inner wall of the cup and the surface of the saucer. Make a handle for the cup from wire, wrap it with twine, and then glue it. Image 11.
- Lay out a twine flower, glue it to the surface of the cup, and attach a coffee bean to the center.
A steaming cup of coffee beans is ready! I recommend watching the video master class!
Floating cups are created according to the same principle. Their main difference lies in the decor. Use the most original decoration elements - flowers, beads, ribbons, sparkles, figurines and whatever your soul desires. Also view a detailed tutorial on how to create a floating cup from kanzashi flowers in this article.
I recommend viewing a photo gallery of ideas for creating floating cups from coffee beans!
A floating cup with a piece of cake.
I, like many people passionate about handicrafts, have already become a real “treasure hunter” of interesting ideas for creativity. I once saw a photo on the Internet that depicted a “floating pouring cup with pouring coffee beans and a cake,” and I was very attracted to this idea. And, of course, I wanted to do something like this myself.
I had to think a little about how to do everything as neatly and as close to reality as possible, since I didn’t see the master class, and in fact, I wasn’t really looking for it. Because I’m used to, through my own experiments, looking for ways to implement this or that craft.
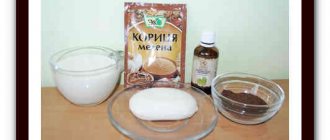
Materials required for work:
- tea pair,
- strong wire 45-50 cm (I have a piece of steel hanger),
- PVA glue,
- any napkins,
- a piece of foam plastic (preferably fine-grained),
- a stationery knife or a kitchen knife with a blade - a small file,
- acrylic paints (white and brown),
- soft and hard brushes,
- roasted coffee beans,
- hot glue gun,
- pliers,
- round pliers,
- scissors,
- adhesive plaster.
These are all the basic materials that I needed, then everything depends on your imagination.
My decor: coconut flakes, berries, green leaves.
The longest process for our composition is to “cook” the mini-cake, so let’s start with that.
I decided to make a piece of cake from a material that I always have on hand - polystyrene foam. If there is no foam, you can use any available materials, such as cardboard.
It is better to use fine-grained foam, it crumbles less when cutting and the surface is smoother. We decide on the size and shape of the cake and cut it out.
Now we need to solve a small problem: how to paint the cake layers as evenly as possible so that the surface has a glossy appearance. Since the surface of the foam is porous, we will proceed in the following way.
Let's arm ourselves with napkins, a hard brush and PVA glue. Carefully cover the cake with small pieces of napkin, as with the papier-mâché technique. This way we level the entire surface.
First one part, after the glue dries - the second.
Now you can paint; for convenience, you can draw the cakes with any pencil.
I painted the top and “chocolate” layers of our cake with brown paint. Left it to dry.
Then the bottom and “white cream”.
The back of the cake was decorated with coconut shavings, simply mixed with PVA glue and applied to the surface.
These are such delicious preparations...
Now you can start creating the entire composition of the floating cup with a cake.
I would like to note right away: since I use ceramic mugs, the weight of which is quite decent, I recommend you the following method of fastening, so that in the future there will be no troubles and the spills will delight you for a long, long time.
I usually use steel hangers; this wire is very strong and easily holds the cup in place. When working, I always use pliers and round nose pliers, it’s more convenient and the wire bends more evenly.
We bend the wire in several turns so that it lies evenly on the bottom of the mug and then repeats the bend of the cup itself as much as possible.
Coming out of the cup, we slightly lift the wire up and smoothly bend it down again, so that later our flow of grains will look beautiful and naturally flowing out of the cup, and not behind it.
We decide in what position the handle of the cup will be and fix the wire with hot glue. Let's wait a little until the glue has completely cooled.
We pierce our cake with a wire tail, decide on the place in advance. It all depends on how you want the cake to be placed on the plate and how exactly the coffee beans are spilled onto it.
At the end of the wire, use pliers to bend the “leg”, which will give the cup support.
At the bottom of the cake, at the point of contact with the “leg,” you should make a recess for the wire so that the cake does not float, but lies on a plate.
If you didn’t calculate it a little, don’t worry, you can always decorate it with grains.
Once again we try on how the cake will be placed on the saucer. In order not to miss, you can mark with any felt-tip pen.
We glue the leg with hot glue, on top, for additional fixation, we place a cake on the glue.
We wait a couple of minutes for the glue to cool completely.
We make sure that everything is held tightly and begin to prepare the wire for gluing the coffee beans.
First, I glued an adhesive plaster to the bottom of the mug, then a thin strip, and then carefully wrapped the remaining part of the wire. But not too much, otherwise the flow of grains will look too massive.
We paint the entire adhesive plaster with brown paint, this will give us the opportunity to cover the stream with grains in one layer and the gaps will not be noticeable.
Let's prepare coffee beans: medium in size, whole and pleasing to the eye. Then, carefully begin to glue each grain. Starting from the bottom of the mug and going down.
The only thing I want to warn you about is! Be careful! Take care of your fingers! The glue is very hot!
This is what ended up happening...
Decorated a little... My floating mug with pouring coffee beans and a piece of cake is ready.
I did not cover it with varnish in order to leave the incredible coffee-coconut aroma of this craft.
You can also decorate a plate with an acrylic outline, as is done in very expensive restaurants.
And complement all this beauty with “chocolate” decoration...
Have fun creating!
I was glad to help!
I create detailed master classes with step-by-step photos and video instructions.
DIY floating coffee mug.
True coffee connoisseurs will never refuse a mug of an invigorating drink made from selected coffee. But not everyone realizes that this is far from the only area of application for coffee beans: the aromatic product has long been enjoyed by craftswomen. A steaming cup of coffee will surprise you not only with its spectacular appearance, but also with its magnificent aroma. Moreover, you can make such a craft with your own hands in just 2-3 hours. Topiary in this style is often decorated with coins, candies or flowers, but in this master class the main focus will be on the coffee and cake on the saucer.
For a master class on creating a topiary flying cup with your own hands, we will need:
- cup, saucer;
- strong wire;
- hot glue;
- glue “Moment” or “Titan”;
- acrylic paints - white and brown;
- acrylic varnish;
- coffee beans;
- napkin;
- coconut flakes;
- a piece of insulation;
- stationery knife.
Potty
The coffee pot should not have holes in the bottom. If the chosen option has these, fill the bottom with hot glue.
To create artificial soil, dilute alabaster. To do this, pour water into the future pot. Pour it into a bucket or cup. Smoothly add alabaster, stirring regularly, until the consistency of thick sour cream.
Mix the alabaster and quickly pour it into the container, retreating a couple of centimeters from the edges. Place the tree in the center of the pot and hold it for a few minutes until the alabaster hardens. Leave the topiary for 24 hours until the “soil” is completely dry.
After drying, the base of the tree can be covered with moss or pasted over with coffee residue. You can also add glass pebbles, beans or pebbles.
The article lists only the most common options for crafts made from coffee beans. In fact, there are a lot of ideas and options for using coffee in handicrafts. Photos of crafts made from coffee beans will help you choose another composition or idea.
Many lovers of handicrafts will enjoy coffee creativity. And the rich smell of aromatic coffee will give needlewomen a great mood. And it will inspire the creator to implement ever more daring new souvenir ideas.
Coffee souvenirs are always a great and special gift for birthdays, New Years and other holidays. And most importantly, the examples given are suitable for both beginners in creative activity and real professionals in the art of needlework.
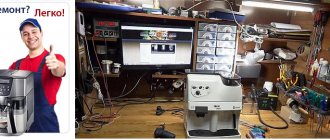
How to make quality crafts from coffee?
There is no need to be afraid to make various crafts with your own hands. Having understood the manufacturing technology, as well as using high-quality materials, you can create real masterpieces. To do this, you should follow a few simple tips. These include:
- Use only high-quality materials in your work. It is not necessary to buy expensive materials or other items. Most things that will help in needlework can be found at home for free.
- You cannot copy other people's work. It's better to show a little imagination. As a result, this will lead to success, which will help you create unique compositions.
- Get real pleasure from work. When you put part of your soul into a craft, it becomes noticeable in the result. Such things have a soul.
VIDEO: What can you make from coffee with your own hands?
Beautiful crafts made from coffee
Interesting ideas for souvenirs
Photos of coffee crafts
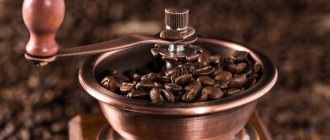
What do we know about coffee beans?
Basically, we see them already packaged in tight bags on store shelves. They come there from Brazil (every third), Colombia, Ethiopia, Vietnam and other hot countries. The climate in Russia is unsuitable, but there have been attempts to grow a plantation. Unsuccessful so far.
The two main varieties, arabica and canephora (robusta), are visually not much different from each other. These are dried berry seeds from 5 to 10 mm in length, with a sloping back and a flattened base. Arabica, slightly larger, with a shape tending towards an oval. Robusta is rounder and smaller, but its cost is two times lower.
The degree of roasting is important for decoration:
| Lightweight | New England, cinnamon. Creamy tone of rich beige. |
| Average | Urban, American, brown. Juicy brown color, with an oily sheen. |
| Strong | Viennese, full city. Dark chocolate shade with shimmer. |
| Maxi | French, Italian. Almost black. |
| None | Common vegetable green color. |